Discover a wholesome twist on classic comfort food with our easy slow cooker beef stew. Tender beef, zucchini, cauliflower, and onions simmer in a rich broth, perfect for busy weeknights or cozy weekends. Enjoy a nourishing meal that the whole family will love!
Imagine coming home after a long day to the tantalizing aroma of tender beef and fresh vegetables filling your home. With this recipe, you can enjoy a hearty, nutritious meal that is as easy to prepare as it is delightful.
Comforting Appeal of Hearty Stew
A warm bowl of beef and vegetable stew embodies the essence of comfort food. The tender chunks of beef simmered perfectly and melded beautifully with vibrant zucchini and cauliflower, creating a nourishing and satisfying dish.
The rich beef broth envelops these ingredients, infusing every bite with deep flavors. Each spoonful warms you from the inside out, making it an ideal choice for chilly evenings or cozy family gatherings.
The Nutritional Benefits
This stew is not only delicious but also loaded with nutrients. Packed with protein from the beef and an array of vitamins from the vegetables, it supports a healthy lifestyle without compromising taste.
The inclusion of zucchini and cauliflower adds fiber, which aids in digestion and keeps you feeling full longer. Just 10 grams of carbohydrates per serving aligns perfectly with low-carb dietary preferences.
Simple Preparation for Busy Lives
One of the standout features of this stew is its simplicity. Preparing this meal requires minimal effort, making it a perfect solution for busy weeknights.
With just 15 minutes of prep time, you can have everything in the slow cooker, allowing it to do all the work. Once you set it to cook, you can relax and look forward to a delicious dinner without hovering in the kitchen.
The Heart of the Recipe
The combination of ingredients plays a crucial role in the overall flavor profile of the stew. Starting with succulent beef, chuck adds a rich, meaty taste that pairs perfectly with the fresh vegetables.
Incorporating aromatics like onion and garlic elevates the dish, creating a fragrant base that enhances the cooking process. The Worcestershire sauce and spices like thyme and paprika contribute depth, rounding out the flavors beautifully.
Serving Suggestions
To serve, ladle the stew into bowls, and don’t forget the finishing touch—a sprinkle of fresh parsley. This simple garnish brightens the dish and adds a pop of color, making the meal even more inviting.
Ingredients
2 pounds beef chuck, cut into 1-inch cubes
1 medium onion, chopped
2 cloves garlic, minced
3 medium zucchini, diced
2 cups cauliflower florets
1 bell pepper, chopped
4 cups beef broth (low sodium)
1 tablespoon Worcestershire sauce
1 teaspoon dried thyme
1 teaspoon paprika
Salt and pepper to taste
Fresh parsley for garnish
Instructions
Prepare the Ingredients: Cut the beef into cubes and chop the vegetables.
Combine in Crockpot: Add the meat, onion, garlic, zucchini, cauliflower, and bell pepper into the crockpot.
Season: Add the beef broth and Worcestershire sauce, then sprinkle with thyme, paprika, salt, and pepper.
Cook: Cover and cook on low for 7-8 hours or high for 4-5 hours until the beef is tender.
Serve: Once cooked, ladle the stew into bowls and garnish with fresh parsley.
Estimated Nutritional Information (Per 8 oz Serving) Calories: 360 kcal Protein: 30g Fat: 20g Saturated Fat: 8g Carbohydrates: 12g Dietary Fiber: 4g Sugars: 4g (naturally occurring from vegetables) Net Carbs: 8g Sodium: 700mg (varies based on broth, Worcestershire sauce, and added salt)
Number of Servings: 8
Final Thoughts
This beef chuck stew with vegetables is a hearty and flavorful dish, perfect for a comforting meal anytime of year. The tender beef, paired with nutrient-rich zucchini, cauliflower, and bell pepper, creates a satisfying balance of protein and low-carb goodness, while the thyme and paprika add a warm, aromatic depth. With approximately 8 servings, it’s an ideal option for feeding a family or prepping meals ahead of time. The flexibility to adjust salt and spice levels makes it adaptable to any palate, ensuring it’s as delicious as nourishing.
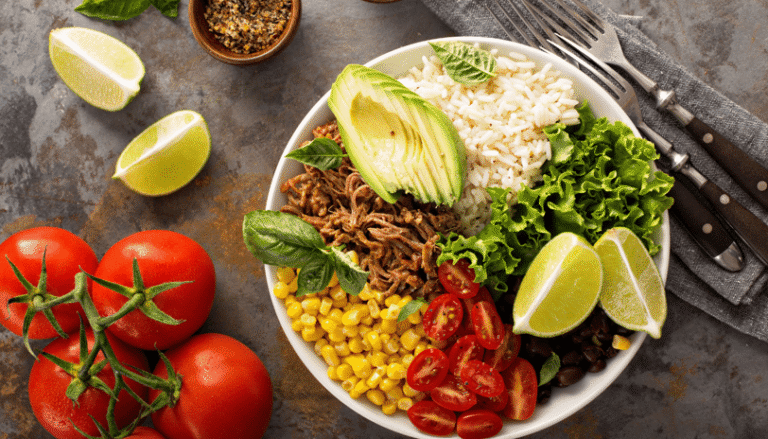
Tender, juicy pork shoulder slow-cooked to perfection with a blend of bold spices, citrus, and aromatics, then crisped for a satisfying texture. This versatile Mexican-inspired dish is perfect for tacos, burritos, or salads, offering a delicious, hands-off meal that’s ideal for busy days.
Pork carnitas are a staple in Mexican cuisine, and for good reason—they’re tender, juicy, and bursting with flavor. The name “carnitas” translates to “little meats,” which perfectly describes the shredded, crispy pork that’s the star of this dish. Traditionally made by slow-cooking pork shoulder until it’s fall-apart tender, then crisping it up for that irresistible texture, carnitas are perfect for tacos, burritos, or even salads. This slow cooker version makes the process easy and hands-off while still delivering authentic flavor. Whether you’re meal-prepping for the week or hosting a casual dinner, these pork carnitas will impress.
Why You’ll Love This Recipe
Effortless Cooking: The slow cooker does most of the work, making this recipe perfect for busy days.
Versatile: Serve the carnitas in tacos, burritos, quesadillas, or over a salad for a low-carb option.
Flavorful and Tender: The combination of spices, citrus, and slow cooking creates melt-in-your-mouth pork with a crispy finish.
Customizable: Easily adapt the recipe for dietary preferences, including low-carb and gluten-free options.
Ingredients
For the Pork:
3-4 lbs boneless pork shoulder (or pork butt), cut into 2-inch chunks1 tablespoon kosher salt1 teaspoon black pepper2 teaspoons ground cumin1 teaspoon dried oregano1 teaspoon chili powder (optional, for a bit of heat)4 cloves garlic, minced1 medium onion, quarteredJuice of 1 orange (about ¼ cup)Juice of 1 lime (about two tablespoons)½ cup chicken broth or water
For Serving: Warm corn tortillas (or lettuce wraps for low-carb) Diced onions Fresh cilantro, chopped. Lime wedges Salsa or guacamole (optional)
Cooking Instructions
1. Prepare the Pork
Trim any excess fat from the pork shoulder, then cut it into 2-inch chunks. This helps the meat cook evenly and absorb the flavors.
In a small bowl, mix the salt, pepper, cumin, oregano, and chili powder (if using). Rub the spice mixture all over the pork chunks, ensuring they’re well-coated.
2. Assemble in the Slow Cooker
Place the seasoned pork chunks in the slow cooker.
Add the minced garlic, quartered onion, orange juice, lime juice, and chicken broth (or water). The liquid should come about halfway up the pork—don’t submerge it completely.
3. Slow Cook
Cover the slow cooker and cook on low for 8 hours or until the pork is tender and quickly shreds with a fork.
Tip: If you’re short on time, you can cook on high for 4-5 hours, but the low-and-slow method yields the best texture.
4. Shred the Pork
Once the pork is cooked, transfer it to a large bowl with a slotted spoon. Reserve the cooking liquid.
Shred the pork using two forks. If you prefer a finer texture, you can chop the shredded meat slightly.
5. Crisp the Carnitas
Broiler Method: Preheat your broiler. Spread the shredded pork in an even layer on a baking sheet. Drizzle with a few tablespoons of the reserved cooking liquid. Broil for 3-5 minutes or until the edges are crispy and golden. Watch closely to avoid burning.
Skillet Method: Heat a tablespoon of oil in a large skillet over medium-high heat. Add the shredded pork in batches, pressing it down to crisp the bottom. Cook for 2-3 minutes per side until crispy.
6. Serve
Serve the crispy pork carnitas in warm corn tortillas, topped with diced onions, fresh cilantro, and a squeeze of lime.
For a low-carb option, consider using lettuce wraps or serving over a salad.
Add salsa, guacamole, or your favorite toppings for an extra burst of flavor.
Tips and Variations
Make it Spicier: Add a diced jalapeño or a pinch of cayenne pepper to the slow cooker for an extra kick of heat.
Enhance the Flavor: Toss in a cinnamon stick or a couple of bay leaves for a subtle depth of flavor.
Gluten-Free: Ensure all spices and broth are gluten-free, and serve with corn tortillas or lettuce wraps.
Meal Prep: Carnitas store well in the fridge for up to 4 days or in the freezer for up to 3 months. Reheat in a skillet to maintain crispiness.
Why Pork Shoulder is Perfect for Carnitas
Pork shoulder (or pork butt) is the ideal cut for carnitas because it has a good balance of meat and fat. The fat renders during the slow cooking, keeping the meat moist and flavorful. Cutting the pork into chunks allows the seasoning to penetrate more evenly and slightly speeds up the cooking time.
Serving Suggestions
Tacos: The classic way to enjoy carnitas. Use warm corn tortillas and top with onions, cilantro, and fresh lime juice.
Burrito Bowls: Serve over cauliflower rice with black beans, avocado, and salsa for a low-carb, high-protein meal.
Salad: Top a bed of mixed greens with carnitas, diced tomatoes, avocado, and a drizzle of lime vinaigrette.
Quesadillas: Layer carnitas with cheese between two tortillas and cook until crispy.
Nutritional Information (Per Serving)
Estimated Nutritional Information (Per 4 oz Serving) Calories: 250 kcal Protein: 24g Fat: 15g Saturated Fat: 5g Carbohydrates: 3g Dietary Fiber: 0g Sugars: 1g (naturally occurring from orange juice and onion) Net Carbs: 3g Sodium: 650mg (varies based on broth and kosher salt)
My Takeaway
Pork carnitas are a crowd-pleaser, and this slow cooker version makes them accessible even on the busiest days. The combination of tender, juicy pork with a crispy finish is irresistible, and the versatility means you can enjoy it in countless ways. Whether serving them at a party or prepping for the week, these carnitas will become a staple in your recipe rotation. Give them a try, and let the slow cooker do the heavy lifting!
Discover the refreshing world of mocktails enhanced with natural supplements—a delicious and healthy way to reduce your alcohol consumption. In this article, we explore the advantages of cutting back on alcohol and how these innovative drinks can support your wellness journey. Learn about the benefits of natural supplements like adaptogens and vitamins, and get inspired by our collection of flavorful mocktail recipes designed to delight your senses and nourish your body.
Are you tired of the same old happy hour routine? Do you crave a way to unwind without the dreaded hangover or compromising your sober lifestyle? Well, you’re in luck! I’ve got just the thing for you: herbal mocktails that deliver a calming buzz without a drop of alcohol. These delightful drinks are refreshing and packed with ingredients like kava and adaptogens that help reduce stress and promote relaxation. Plus, they’re perfect for any occasion—whether hosting a girls’ night in or simply treating yourself to some well-deserved me-time. Let’s dive into the world of non-alcoholic herbal mocktails and discover how to sip your way to serenity.
Why Herbal Mocktails Are Your New Best Friend
Let’s face it: life can be a lot, and between juggling work, family, and everything, we sometimes need help to chill out. Wine is my favorite way to do that, but when I am trying to cut back on alcohol, I have some alternatives that are delicious and also provide a relaxing experience. Enter herbal mocktails—your new go-to for relaxation. These drinks are like a spa day in a glass, minus the hefty price tag. They’re crafted with calming ingredients like kava, adaptogens, and soothing herbs that give you a gentle buzz, helping you unwind without the booze.
Here’s what makes them magical:
– Kava: This superstar herb is known for easing anxiety and promoting a sense of calm. It’s been used for centuries in traditional ceremonies, and now it’s making its way into your mocktail glass.
– Adaptogens: These robust plants, like ashwagandha and rhodiola, help your body adapt to stress. They’re like a personal Zen master, keeping you balanced and serene.
– Herbs: From chamomile to mint, herbs add flavor and function, turning your drink into a soothing elixir.
Not only do these mocktails support your mental well-being, but they’re also a fun and creative way to experiment with flavors. Ready to get started? Let’s meet your new favorite drinks.
Mocktail Recipes to Soothe Your Soul
I’ve whipped up three delicious recipes that are as easy to make as they are to sip. Each has a unique flavor profile and a name that’ll make you feel like you’re on a tropical getaway—even if you’re just on your couch. Let’s get mixing!
Tranquil Twilight
Imagine the sun setting over a peaceful beach, the day’s worries melting away—that’s the vibe of this mocktail. Kava takes center stage here, delivering a calming effect when winding down.
1. Mix the kava powder with the coconut water until well combined. (Pro tip: use a shaker for a smoother blend.)
2. Add the lime juice and stir. I like to add a packet of stevia for sweetness and a sprinkle of sea salt because it adds a margarita vibe.
3. Pour over ice and garnish with mint.
4. Sip slowly and let the tranquility wash over you.
Why It Works: Kava’s calming properties pair beautifully with the hydrating coconut water, while the lime adds a zesty kick. It’s like a mini vacation in a glass.
Serenity Sipper
This beauty is your ticket to a stress-free state of mind. With adaptogens like ashwagandha, it’s designed to help you stay balanced, no matter what life throws your way.
– 1 cup Ocean Spray® ZERO Sugar Mixed Berry Juice Drink (Any flavor will work, but this is one of my favorites.)
– 1 tablespoon honey (optional, but yummy!)
– Sparkling water to top
– Instructions:
1. In a glass, mix the ashwagandha powderwith the berry juice and honey until dissolved.
2. Add ice and top with sparkling water.
3. Stir gently and enjoy the serene vibes.
Why It Works: Ashwagandha helps reduce stress, while the juice adds rich flavor without the sugar and calories. The sparkling water gives it a celebratory feel—because you deserve to celebrate yourself. Garnish with fresh or frozen berries for an extra treat!
Zen Zinger
Need a little pep in your step but still want to keep it calm? This mocktail is like a yoga class for your taste buds—calming yet invigorating, with a zesty twist.
1. Steep the chamomile tea bag in hot water for 5 minutes.
2. Remove the tea bag and add the grated ginger, lemon juice, and honey.
3. Stir well and let it cool.
4. Serve over ice for a zesty yet calming drink.
Why It Works: Chamomile is a classic for relaxation, while ginger adds a gentle kick to keep things interesting. It’s the perfect balance of zen and zing.
Here are three new mocktail recipes, each featuring a unique calming ingredient—lemon balm extract, chamomile extract, and magnesium—to help you relax and unwind naturally. These drinks are refreshing, flavorful, and crafted to soothe your mind and body. Let’s get mixing!
Lemon Balm Bliss
This mocktail is like a gentle hug in a glass. Lemon balm extract, known for its calming and mood-lifting properties, pairs with sweet pineapple juice and a hint of basil for a tropical yet serene sip.
1. Muddle the basil leaves lightly in a glass to release their aroma.
2. Add the lemon balm extract and pineapple juice, stirring to combine.
3. Fill the glass with ice and top with a splash of club soda.
4. Garnish with a pineapple slice.
5. Sip and let the soothing lemon balm work its magic.
Why It Works: Lemon balm is a natural stress reliever, and the pineapple adds a burst of sweetness that feels indulgent yet light.
Chamomile Cloud
Float away on a cloud of calm with this delicate mocktail. Chamomile extract brings classic soothing power, blended with tart grapefruit juice and a touch of honey for a dreamy, floral finish.
– ¾ cup Ocean Spray Diet Ruby Red Grapefruit Juice
– 1 tablespoon honey
– Ice
– Sparkling water
– Grapefruit wedge for garnish
– Instructions:
1. In a small bowl, mix the chamomile extractwith the honey until dissolved.
2. Pour the mixture into a glass with Ocean Spray Diet Ruby Red Grapefruit Juice and stir well.
3. Add ice and top with sparkling water.
4. Garnish with a grapefruit wedge.
5. Take a sip and feel the calm settle in.
Why It Works: Chamomile extract is a time-honored relaxant, perfectly complemented by the zesty grapefruit and subtle sweetness of honey.
Magnesium Moonrise
This mocktail is your nighttime wind-down companion. Magnesium powder, a mineral known for promoting relaxation and better sleep, mixes with rich cran-pomegranate juice and a hint of lavender for a luxurious, calming treat.
1. In a glass, dissolve the magnesium powder and cran-pomegranate juice.
2. Add the lavender extract sparingly and test before adding more. It adds a wonderful flavor unless too much is added.
3. Fill the glass with ice and stir gently.
4. Garnish with a sprinkle of pomegranate seeds.
5. Sip slowly as you ease into a peaceful evening.
Why It Works: Magnesium supports muscle relaxation and stress relief, while the pomegranate and lavender add a sophisticated, calming flavor profile.
These mocktails are perfect whenever you need a moment of peace, whether after a busy day or just because you deserve it. Each harnesses the natural power of herbs, extracts, or supplements to help you relax without alcohol. Mix one up, kick back, and enjoy the calm!
How to Make These Mocktails Part of Your Routine
Now that you’ve got these fabulous recipes, it’s time to make them a regular part of your life. Here are a few ideas to get you started:
– Mocktail Hour: Swap out your usual happy hour for a “mocktail hour.” Invite your girlfriends over, mix up a batch of Tranquil Twilights, and toast to your fabulous selves.
– Self-Care Sundays: Treat yourself to a Serenity Sipper while you indulge in a bubble bath or curl up with a good book. It’s the ultimate way to recharge.
– Social Gatherings: Impress your friends at your next gathering with a Zen Zinger. The unique flavors will wow them—and you’ll be the hostess with the mostess.
And here’s a little secret: these mocktails are so good that no one will miss the alcohol. Plus, you’ll wake up feeling refreshed and ready to conquer the day. (Hangover? What hangover?)
A Final Sip of Wisdom
I must admit, there’s something undeniably enchanting about a glass of wine at the end of a long day. The rich, velvety notes of a good red or the crisp, refreshing sip of a chilled white can feel like a well-deserved reward. I still savor those moments, enjoying wine in moderation to unwind and celebrate life’s little victories. But sometimes, you need relaxation without the buzz, and that’s where mocktails come into play. These herbal concoctions are my go-to for any relaxation time—perfect for a cozy night, a spontaneous girls’ night, or even a midday refresh. They let me save the wine for when I want to indulge while keeping that chill vibe strong. It’s all about finding that sweet balance.
Ladies, embracing a sober lifestyle or simply cutting back on alcohol doesn’t mean you have to sacrifice fun or flavor. These herbal mocktails prove you can have relaxation, a gentle buzz, and a delicious drink in hand. I first discovered the magic of kava when I was feeling particularly frazzled after a hectic week, and let me tell you, it was a game-changer. As a busy mom, I know how hard it can be to find peace, but these mocktails have become my go-to for a quick escape.
So, experiment with these recipes, play with your combinations of herbs and flavors, and find what makes you feel your best. And remember, you’re not just making a drink; you’re crafting a moment of calm in a chaotic world. Cheers to that!
These delightful drinks are a fantastic option if you’re looking to cut back on calories or alcohol—they’re refreshing, creative, and a fun way to treat yourself. I’ll admit, even though I like having these lighter choices in my wellness toolkit, I’d still prefer to reach for a glass of wine. Something about that rich flavor hits the spot for me. Still, I love knowing these mocktails are there when I want to switch it up or keep things a little lighter.
So, whether mixing up a vibrant herbal mocktail or pouring yourself a glass of your favorite wine, here’s to savoring what makes you feel good. You deserve it!
Disclaimer: Before changing your wellness routine, check in with your healthcare provider, especially if you have medical conditions or medications. Stay safe and sip smart, ladies!
Quick note: I recommend and promote top-rated products via affiliate links. If you make a purchase, I earn a small commission at no extra cost to you. Thank you for supporting my work while you snag something extraordinary for yourself!
Explore the cutting-edge world of technology-driven health solutions. From AI-crafted fitness plans to wearable devices that track your every move, learn how these innovations transform wellness into a personalized, empowering experience.
Ever wish you had a personal trainer, nutritionist, and wellness guru all rolled into one, right in your pocket? Well, guess what? Thanks to the wonders of technology, that dream is becoming a reality. Today, we’re exploring the world of technology-driven health solutions, revolutionizing the way we approach wellness. From AI-powered fitness plans to wearable devices that track everything from your steps to your sleep, the future of health is here—and it’s more personalized than ever. So, grab your favorite latte (or green smoothie if you’re feeling extra virtuous), and let’s explore how these innovations can help you live your best, healthiest life.
Introduction: Welcome to the Future of Wellness
First, staying on top of your health can sometimes feel like a full-time job. Between juggling work, family, and that ever-growing to-do list, finding time for self-care can be tricky. But what if I told you that technology is stepping up to make wellness more straightforward, more accessible, and—dare I say—fun? We’re talking about AI-driven fitness plans that adapt to your goals and wearable devices that act like your personal health assistant. These tech-savvy tools are not just for the gadget-obsessed; they’re for anyone who wants to take control of their health in a way that fits their lifestyle. And the best part? You don’t need to be a tech wizard to use them. So, whether you’re a busy mom, a career queen, or someone who wants to feel amazing, this article is for you.
AI: Your New BFF for Personalized Fitness
Remember when “personalized” meant choosing between a few generic workout videos? Yeah, those days are over. Enter AI—artificial intelligence—that’s here to make your fitness journey as unique as you are. Think of AI as your super-smart workout buddy who knows precisely what you need, when, and how to keep you motivated (without the awkward small talk).
How AI Works Its Magic
AI-powered fitness apps and platforms use data—lots of it—to create a plan tailored just for you. Here’s how it works:
– Data Collection: AI gathers info from sources like your wearable device, your fitness goals, and even your daily habits. It might ask about your workout preferences, how often you exercise, and what you want to achieve (hello, toned arms or stress relief!).
– Analysis: Then, it analyzes this data to create a customized fitness plan. Whether you’re into yoga, HIIT, or strength training, AI can suggest workouts that match your style.
– Adaptation: The best part? AI doesn’t just set it and forget it. It adapts your plan based on your progress, feedback, and mood. Had a rough day? It might suggest a gentle stretch instead of a hardcore cardio session.
It’s like having a personal trainer available 24/7, minus the hourly rate.
Top AI-Powered Fitness Apps to Try
Ready to give AI a whirl? Here are two top-rated apps that are making waves in the wellness world:
– Fitbod: This app uses AI to design strength-training workouts based on your goals, experience level, and available equipment. It’s perfect for women who want to build muscle, boost confidence, or feel more substantial. You can download Fitbod from the App Store or Google Play, and it’s also available at https://fitbod.me/ for easy access.
– MyFitnessPal: While it’s known for nutrition tracking, MyFitnessPal also uses AI to suggest personalized meal plans and workout routines. It’s like having a dietitian and trainer in one app. Find it at https://www.myfitnesspal.com/ or your favorite app store.
Pro tip: If you’re new to AI fitness, start with a free trial to see which app vibes with your style. And hey, no judgment if you accidentally tell your AI coach about your day—it’s a great listener.
Wearable Devices: Your Wellness Sidekick
If AI is your workout buddy, wearable devices are your wellness sidekick—always there, continuously tracking, and always ready to give you a nudge (or a buzz) when needed. These nifty gadgets have come a long way from the clunky pedometers of the past. They’re sleek, innovative, and packed with features that can help you understand your body like never before.
What Can Wearables Do?
Wearables are like the Swiss Army knives of health tech. Here’s a taste of what they offer:
– Activity Tracking: Wearables monitor how much you move daily from steps to stairs. They’re perfect for setting daily goals or challenging yourself to a step competition with friends.
– Heart Rate Monitoring: Whether you’re working out or just working, wearables can monitor your heart rate to help you understand your fitness level and stress.
– Sleep Tracking: Ever wonder why you’re tired even after eight hours? Wearables can analyze your sleep stages and quality, allowing you to make adjustments for improved rest.
– Cycle Tracking: For women, many wearables now offer menstrual cycle tracking, providing insights into fertility, mood, and energy levels. It’s like having a personal calendar that knows you better than yourself.
And that’s just the beginning. Some wearables even track skin temperature, stress levels, and oxygen saturation. It’s like having a mini health clinic on your wrist (or finger!).
Top Wearable Devices to Elevate Your Wellness
Ready to join the wearable revolution? Here are some top-rated devices that are perfect for women:
– Apple Watch Series 10: The queen of smartwatches, the Apple Watch does it all—activity tracking, heart rate monitoring, sleep insights, and even ECG readings. Plus, it’s stylish enough to wear from the gym to girls’ night. With fast, free shipping, you can find the Apple Watch Series 10 here.
– Fitbit Charge 6: If you want a fitness-first device, the Fitbit Charge 6 is a fan favorite. It offers advanced health metrics, including stress management tools and a built-in GPS for outdoor workouts. Snag a Fitbit Charge 6 and start tracking.
– Oura Ring: For something more discreet, the Oura Ring is a game-changer. Worn on your finger, it tracks sleep, activity, and readiness, giving you a daily score to optimize your routine. It’s perfect for women who want wellness insights without the need for a wristband. Check out the Oura Ring.
Fun fact: Wearables are so smart now that some can even remind you to drink water or take a deep breath. It’s like having a tiny wellness fairy on your shoulder (or wrist).
The Perfect Pair: AI and Wearables Working Together
Now, imagine combining the power of AI with the data from your wearable device. It’s like peanut butter and jelly—better together. Many AI-powered apps can sync with your wearable to provide even more personalized insights. For example:
– Your wearable tracks your sleep, and the AI app suggests a bedtime routine to improve your rest.
– Your device monitors your heart rate during workouts, and the AI adjusts your fitness plan to avoid overtraining.
– Your wearable tracks your cycle, and the AI app predicts your energy levels so you can plan workouts accordingly.
It’s a wellness dream team that helps you make smarter, data-driven decisions about your health. And let’s be honest, who doesn’t love a good data point to back up that “I need a rest day” feeling?
Why This Matters for Women
You might wonder, “Why is this tech especially great for women?” Besides being busy humans, women often juggle unique health needs—whether it’s cycle tracking, pregnancy, or managing stress from multiple roles.
Technology-driven solutions offer:
– Convenience: No need to schedule appointments or wait for lab results. Your data is at your fingertips.
– Empowerment: Understanding your body’s patterns helps you make informed choices, from workouts to nutrition.
– Community: Many apps and devices have social features, so you can connect with friends or join challenges for extra motivation.
Plus, let’s not forget the style factor. Wearables have evolved into fashion statements, offering options that range from sleek and chic to bold and sporty. You can find one that matches your vibe, whether you’re a minimalist or a trendsetter.
Ready to Dive In? Here’s How to Get Started
Feeling inspired? Here’s how to embrace these tech-driven wellness tools without getting overwhelmed:
1. Start Small: If you’re new to tech, begin with a simple wearable like the Fitbit Inspire 3. It’s user-friendly and offers all the basics. Check out the Fitbit Inspire 3.
2. Set Clear Goals: Decide what you want to achieve—better sleep, more activity, or stress management—and choose tools that align with those goals.
3. Explore Apps: Download a few AI-powered fitness apps to see which feels right. Many offer free trials so that you can test them out.
4. Sync and Go: If you’re ready for the whole experience, sync your wearable with an AI app for personalized insights.
And remember, it’s okay to take it slow. Wellness is a journey, not a sprint (unless you’re doing HIIT).
The Future is Bright (and Healthy)
As technology continues to evolve, the future of wellness looks brighter than ever. Imagine a world where your wearable can detect health issues before they become severe or where AI creates a fitness plan that adapts to your menstrual cycle. It’s not sci-fi—it’s the direction we’re heading. And the best part? You don’t have to wait for the future to start benefiting. These tools are available now, ready to help you feel your best today.
So, technology can help you achieve your fitness goals, sleep like a queen, or better understand your body. And who knows? Maybe one day, your wearable will remind you to take a break and enjoy that latte guilt-free.
There you have it, ladies—an insider’s guide to the tech-driven wellness revolution. Now, go forth and conquer your health goals with the power of AI and wearables. You’ve got this!
Disclaimer: Before changing your wellness routine, check in with your healthcare provider, especially if you have medical conditions or medications. Stay safe and sip smart, ladies!
I share and promote top-rated products via affiliate links. If you make a purchase, I earn a small commission at no extra cost to you. Thank you for supporting my work while you snag something extraordinary for yourself!
Are you struggling with bloating and fatigue? Discover how the anti-inflammatory diet can help you feel lighter, brighter, and more energized. This article, tailored specifically for women, breaks down the benefits of reducing inflammation through delicious, easy-to-prepare foods. Learn practical tips, avoid common mistakes, and start your journey to feeling fabulous today!
Do you ever feel like your body is throwing a silent tantrum—bloating, fatigue, or just that “meh” feeling that won’t quit? You’re not alone, and guess what? It might not be your fault. Inflammation could be the sneaky culprit behind those frustrating symptoms. But don’t worry, I’ve got your back (and your gut) with a solution that’s not only effective but also delicious. Enter: the anti-inflammatory diet. It’s not just a trend—it’s a lifestyle shift that can help you feel lighter, brighter, and more energized. And who doesn’t want to look and feel fabulous, right?
Let’s dive into this diet, why it’s a game-changer for women, and how you can start today. Plus, I’ll sprinkle in some tips, tricks, and a dash of humor to keep things light—because, let’s face it, diets can be a drag, but this one doesn’t have to be!
What Exactly Is the Anti-Inflammatory Diet?
Imagine your body as a VIP nightclub. Inflammation is like that annoying bouncer who lets in all the wrong guests—think of joint pain, bloating, and even breakouts. The anti-inflammatory diet is your new guest list, designed to keep the troublemakers out and let the good vibes (and nutrients) in.
In simple terms, this diet emphasizes foods that help reduce inflammation in the body. Why does that matter? Because chronic inflammation can lead to a laundry list of health issues, from heart disease to autoimmune disorders. For women, it can also mess with hormones, skin, and even mood. Yikes! The good news? You can fight back with your fork. This isn’t about deprivation or counting every calorie. It’s about making intelligent, delicious choices that nourish your body and kick inflammation to the curb. Think of it as self-care on a plate.
Why This Diet Is a Game-Changer for Women
Ladies, we’ve got enough on our plates (pun intended) without dealing with inflammation. From hormonal fluctuations to the daily grind, our bodies are warriors, but even warriors need the right fuel. Here’s why the anti-inflammatory diet is your new best friend:
-Bye-bye bloating: Ever feel like you’re smuggling a balloon under your shirt? Inflammation could be to blame. This diet helps reduce water retention and digestive drama.
– Glowing Skin: Want that “I woke up like this” radiance? Anti-inflammatory foods provide antioxidants that clear breakouts and give you a natural glow.
– Energy Boost: Say goodbye to the 3 p.m. slump. By cutting out inflammatory foods, you’ll feel more energized and less like a zombie by midday.
– Hormonal Balance: Inflammation can throw your hormones out of whack, leading to mood swings and irregular cycles. This diet helps keep things steady.
– Weight Management: While it’s not a “weight loss diet” per se, many women find that reducing inflammation helps them shed stubborn pounds, especially around the midsection.
And let’s be honest: who doesn’t want to feel like a goddess in their skin?
How to Start Your Anti-Inflammatory Journey
Ready to give inflammation the boot? Here’s how to get started without feeling overwhelmed. Remember, it’s about progress, not perfection. You’ve got this!
Step 1: Stock Up on Anti-Inflammatory Superstars
Your fridge and pantry are about to get a glow-up. Focus on these inflammation-fighting heroes:
– Fruits: Berries, cherries, and oranges are packed with antioxidants.
– Veggies: Leafy greens, broccoli, and bell peppers are your new BFFs.
– Whole Grains: Quinoa, brown rice, and oats keep things hearty and healthy.
– Healthy Fats: The good guys are avocado, olive oil, and nuts.
– Protein: Fatty fish like salmon and plant-based options like lentils are key.
– Spices: Turmeric and ginger are like the dynamic duo of anti-inflammatory spices.
Pro tip: If you’re a snack queen, keep some almonds or a piece of dark chocolate (yes, really!) on hand for when cravings hit. Just ensure it’s at least 70% cocoa—because we’re classy like that. Need a little extra help? Check out these top-rated turmeric supplements to boost your spice game.
Step 2: Ditch the Inflammatory Trouble-Makers
Some foods are like that toxic ex—they cause drama. Try to limit or avoid:
– Processed Foods: Think fast food, chips, and anything with a laundry list of ingredients.
– Sugary Drinks: Soda, energy drinks, and even some “healthy” juices can spike inflammation.
– Refined Carbs: White bread, pastries, and sugary cereals are no-nos.
– Red Meat: It’s not the enemy, but moderation is key.
Don’t worry—you must not give up all your favorites overnight. Start small—maybe swap your morning pastry for a smoothie or your soda for sparkling water with a splash of lemon. Baby steps, Babe.
Step 3: Hydrate Like a Boss
Water is your secret weapon. It helps flush out toxins and keeps your cells happy. Aim for at least eight glasses a day, and if plain water bores you, jazz it up with cucumber slices or a squeeze of lime.
A Day on the Anti-Inflammatory Diet: Sample Meal Plan
Not sure where to start? Here’s a delicious day of meals to inspire you. Bonus: they’re easy to prep and Instagram-worthy.
Try a smoothie with spinach, frozen berries, a scoop of protein powder, and almond milk for breakfast. (Pro tip: Use a cute straw for maximum enjoyment.)
Lunch: A salad with grilled chicken, avocado, cherry tomatoes, and a drizzle of olive oil. For extra credit, add a sprinkle of turmeric.
– Snack: A handful of almonds or a small piece of dark chocolate. (Yes, you read that right—chocolate can be anti-inflammatory. You’re welcome.)
– Dinner: Baked salmon with roasted sweet potatoes and broccoli. Squeeze some lemon on top for a zesty kick.
Air Fryer: Your New Kitchen BFF
If you want to make your anti-inflammatory meal prep a breeze, let me introduce you to the air fryer! This handy gadget works like a mini convection oven, allowing you to crisp veggies, cook salmon to perfection, or even whip up a healthier version of fries with minimal oil. It’s a time-saver, ideal for busy schedules when you want nutritious meals without the kitchen marathon. Are you curious about trying one out? Check out these top-rated air fryers, a game-changer for quick, healthy cooking.
Common Mistakes to Avoid (Because We’ve All Been There)
Even the best of us slip up sometimes. Here are a few pitfalls to watch out for:
– Relying Too Much on Supplements: While fish oil or turmeric capsules can help, they’re not a magic bullet. You can’t just pop a pill and expect to undo a lifetime of pizza and ice cream. (Trust me, I’ve tried.) A good fish oil supplement can be a nice addition to a balanced diet.
– Forgetting to Drink Water: Hydration is crucial, especially when eliminating inflammatory foods. Don’t let your cells throw a drought party.
– Overcomplicating It: You don’t need to buy every superfood on the shelf. Start with simple, whole foods and build from there.
Remember, this is a lifestyle, not a crash diet. Be kind to yourself—you’re doing great!
Ready to Feel Amazing? Start Today!
Say goodbye to bloating and hello to feeling fabulous. The anti-inflammatory diet isn’t just about what you eat—it’s about how you feel. More energy, clearer skin, and a happier gut are just a few meals away. Start small, be consistent, and don’t forget to have fun with it. After all, you deserve to feel like the queen you are.
Give it a try, and let me know how it goes—I’d love to hear your success stories (and maybe even a recipe or two). You’ve got this! 💖
Disclaimer: Before changing your wellness routine, check in with your healthcare provider, especially if you have medical conditions or medications. Stay safe and sip smart, ladies!
I share and promote top-rated products via affiliate links. If you make a purchase, I earn a small commission at no extra cost to you. Thank you for supporting my work while you snag something extraordinary for yourself!
Tender, smoky pulled pork gets a healthy makeover with trimmed pork shoulder and a tangy, sugar-free barbecue sauce. This slow cooker recipe is a breeze, offering a nutritious twist on a classic comfort dish. Enjoy it in sandwiches, wraps, or salads—versatile and delicious, it’s perfect for busy, health-conscious food lovers.
Pulled pork is a beloved comfort food, often associated with rich, smoky flavors and tender, juicy meat. However, traditional recipes can be high in sugar and unhealthy fats, which may not align with a wellness-focused lifestyle. As an expert health and wellness chef, I’ve crafted this recipe to deliver all the deliciousness of classic pulled pork while keeping it nutritious and guilt-free. Using a trimmed pork shoulder and a homemade no-sugar-added barbecue sauce, this dish is perfect for anyone looking to enjoy a Southern favorite without compromising their health goals. The slow cooker does most of the work and is ideal for busy schedules, meal prep, or feeding a crowd!
Why This Recipe Works
Leaner Pork Choice: Trimming excess fat from the pork shoulder reduces unhealthy fats while preserving the tenderness that makes pulled pork irresistible.
Homemade Barbecue Sauce: A no-sugar-added sauce crafted from wholesome ingredients that brings bold flavor without relying on sweeteners.
Slow Cooker Magic: Low and slow cooking ensures the pork is fall-apart tender with minimal effort.
Versatile and Meal Prep Friendly: This pulled pork can be used in sandwiches, wraps, or as a protein-packed addition to salads and bowls.
Ingredients
For the Pork:
3-4 lbs pork shoulder (trimmed of excess fat)
2 teaspoons smoked paprika
1 teaspoon garlic powder
1 teaspoon onion powder
1 teaspoon ground cumin
1 teaspoon salt
½ teaspoon black pepper
1 cup low-sodium chicken broth
Sugar-free barbecue Sauce:
1 cup tomato paste (no sugar added)
½ cup apple cider vinegar
2 tablespoons Dijon mustard
1 tablespoon Worcestershire sauce (check for no added sugar)
1 teaspoon smoked paprika
½ teaspoon garlic powder
½ teaspoon onion powder
¼ teaspoon cayenne pepper (optional, for heat)
½ cup water (to thin, as needed)
Preparation
1. Prepare the Pork
Trim any large pieces of fat from the pork shoulder, leaving just enough to keep the meat moist and flavorful during cooking.
Combine the smoked paprika, garlic powder, onion powder, cumin, salt, and black pepper in a small bowl.
Rub the spice mixture evenly over the pork, massaging it on all sides for maximum flavor.
2. Slow Cook the Pork
Place the seasoned pork shoulder into your slow cooker.
Pour the chicken broth around the pork (avoid pouring it directly over the meat to preserve the spice coating).
Cover and cook on low for 8-10 hours or until the pork is tender and quickly pulls apart with a fork.
3. Make the Barbecue Sauce
While the pork cooks, prepare the no-sugar-added barbecue sauce. In a medium saucepan, combine the tomato paste, apple cider vinegar, Dijon mustard, Worcestershire sauce, smoked paprika, garlic powder, onion powder, and cayenne pepper (if using).
Stir the mixture over medium heat until thoroughly combined. Gradually add water until the sauce reaches your preferred consistency—thicker for a bold coating or thinner for a lighter touch.
Simmer for 10 minutes, stirring occasionally. Taste and adjust seasoning as desired.
4. Shred the Pork
Once cooked, remove the pork from the slow cooker and transfer it to a large cutting board.
Shred the pork into bite-sized pieces using two forks, discarding any remaining large fat pieces.
5. Combine with Sauce
Return the shredded pork to the slow cooker.
Pour the homemade barbecue sauce over the pork and stir until evenly coated.
Cook on low for 30 minutes to let the flavors meld together beautifully.
6. Serve
Enjoy the pulled pork on whole grain buns, tucked into lettuce wraps, or served over a bed of greens.
Pair it with a healthy side, such as a salad or roasted vegetables, for a balanced meal.
Tips and Variations
Make it Spicier: Add extra cayenne pepper or a splash of hot sauce to the barbecue sauce for a fiery kick.
Enhance the Flavor: Stir in a teaspoon of liquid smoke for an extra layer of smokiness.
Meal Prep: Store leftovers in an airtight container in the refrigerator for up to 4 days or freeze for up to 3 months.
Low-Carb Option: Skip the buns and serve in lettuce wraps or over cauliflower rice.
Why Choose Trimmed Pork Shoulder?
Pork shoulder is the go-to cut for pulled pork because its natural marbling keeps it juicy and tender during long cooking times. You can significantly reduce the fat content by trimming excess fat without sacrificing texture or taste. If you’re looking for an even leaner alternative, pork loin is an option, though it may result in slightly less moist meat.
Serving Suggestions
Sandwiches: Pile the pulled pork onto whole grain buns and add a few pickles for crunch.
Wraps: Use large lettuce leaves for a low-carb, gluten-free twist.
Salads: Top a mixed green salad with a portion of pulled pork for a protein-packed lunch.
Bowls: Serve over quinoa or brown rice with steamed veggies.
Nutritional Information (Per Serving)
Estimated Nutritional Information (Per 4 oz Serving) Calories: 260 kcal Protein: 24g Fat: 16g Saturated Fat: 5g Carbohydrates: 4g Dietary Fiber: 1g Sugars: 2g (naturally occurring from tomato paste) Net Carbs: 3g Sodium: 480mg (varies based on broth, Worcestershire sauce, and added salt)
Final Thoughts
This healthy slow cooker pulled pork proves that you don’t need sugar-heavy sauces to enjoy a flavorful, satisfying meal. The homemade, sugar-free barbecue sauce is tangy and smoky, perfectly complementing the tender, spiced pork. Whether cooking for a family dinner, prepping meals for the week, or hosting a gathering, this recipe delivers on taste and nutrition. Give it a try and savor a wellness-friendly take on a classic dish!
This healthy and flavorful chili is made with lean ground beef or turkey, fresh vegetables, and bold spices. Toss everything into a slow cooker for an easy, hands-off meal that’s perfect for busy weeknights or meal prep. Packed with protein and fiber, it’s a nutritious, customizable dish—adjust the protein or spice level to suit your taste. Enjoy a comforting, balanced meal with minimal effort!
Chili is the ultimate comfort food—hearty, flavorful, and satisfying. However, traditional recipes can sometimes be high in calories and fat, which may not align with a wellness-focused lifestyle. That’s where this recipe comes in: a healthy slow cooker chili that delivers all the bold flavors you love without the guilt. Whether you choose lean ground beef or turkey, this dish is packed with protein, fiber, and nutrients, thanks to a generous helping of vegetables and a carefully crafted spice blend. The slow cooker does all the work, perfect for busy weeknights or meal prep. Get ready to enjoy a bowl of comfort that’s as good for your body as it is for your taste buds!
Why This Recipe Works
Lean Protein Options: Opt for lean ground beef or turkey for a protein-rich base that keeps the dish light yet satisfying.
Vegetable-Packed: Extra veggies, such as bell peppers and carrots, boost the fiber and nutrient content without sacrificing flavor.
Slow Cooker Convenience: Set it and forget it! The slow cooker ensures tender, flavorful chili with minimal effort.
Customizable Heat: Adjust the spice level to suit your taste, from mild and family-friendly to fiery and bold.
Healthy Toppings: Opt for nutritious toppings like Greek yogurt, avocado, or fresh herbs instead of heavy add-ons.
Ingredients
For the Chili:
1 lb lean ground beef (90% lean) or ground turkey
1 tablespoon olive oil (optional for browning)
1 medium onion, diced
2 cloves garlic, minced
1 red bell pepper, diced
1 green bell pepper, diced
2 medium carrots, peeled and diced
1 (15 oz) can diced tomatoes (no salt added)
1 (15 oz) can tomato sauce (no salt added)
1 (15 oz) can kidney beans, drained and rinsed
1 (15 oz) can black beans, drained and rinsed
1 cup low-sodium beef or chicken broth
2 tablespoons chili powder
1 teaspoon ground cumin
1 teaspoon smoked paprika
½ teaspoon dried oregano
¼ teaspoon cayenne pepper (optional, for heat)
Salt and black pepper, to taste
For Serving (Optional):
Sour cream
Diced avocado
Fresh cilantro or parsley, chopped
Lime wedges
Shredded low-fat cheese
Preparation
1. Brown the Meat (Optional but Recommended)
Heat the olive oil in a large skillet over medium heat for extra flavor. Add the ground beef or turkey and cook until browned, breaking it up with a spoon as it cooks (about 5-7 minutes). Drain any excess fat.
Tip: If you’re short on time, you can skip this step and add the raw meat directly to the slow cooker—it will still cook through, though browning adds depth.
2. Prepare the Slow Cooker
Place the browned meat (or raw, if skipping the browning step) into the slow cooker.
Add the diced onion, minced garlic, bell peppers, carrots, tomatoes, tomato sauce, kidney beans, black beans, and broth.
3. Season the Chili
Mix the chili powder, cumin, smoked paprika, oregano, cayenne pepper (if using), salt, and black pepper in a small bowl.
Sprinkle the spice mixture over the ingredients in the slow cooker and stir well to combine.
4. Cook
Cover the slow cooker and cook on low for 6-8 hours or high for 3-4 hours until the vegetables are tender and the flavors have melded.
Tip: Add more broth or water if the chili seems too thick to reach your desired consistency.
5. Adjust Seasoning and Serve
Taste the chili and adjust the salt, pepper, or other spices as needed.
Ladle into bowls and top with healthy toppings, such as shredded cheddar, avocado, fresh herbs, or a squeeze of lime.
Tips and Variations
Make it Spicier: Add extra cayenne pepper, diced jalapeños, or a splash of hot sauce for an extra kick of heat.
Vegetarian Option: Substitute the meat with an additional can of beans or lentils for a hearty, plant-based alternative.
Extra Veggies: Add diced zucchini, mushrooms, or spinach for an extra boost of nutrition.
Meal Prep: This chili stores well in the fridge for up to 4 days or in the freezer for up to 3 months. Reheat on the stove or in the microwave.
Serving Ideas: Enjoy with a side of whole grain cornbread, over brown rice, or cauliflower rice for a low-carb option.
Why Choose Lean Ground Beef or Turkey?
Both lean ground beef and turkey are excellent choices for a healthy chili. Lean ground beef (90% lean or higher) provides a rich, traditional flavor with less fat, while ground turkey offers a lighter, milder taste with lower calories and saturated fat. If you want to reduce red meat consumption or prefer a leaner option, turkey is an excellent substitute without sacrificing protein or satisfaction.
Estimated Nutritional Information (Per 1.5-cup Serving with Lean Ground Beef)
Sodium: 450mg (varies based on broth and added salt)
With Ground Turkey (Alternative)
Calories: 290 kcal
Fat: 7g
Saturated Fat: 2g
Protein: 22g
Other values remain similar (carbs, sodium)
My Takeaway
This healthy slow cooker chili is the perfect solution for busy weeknights when you crave something hearty but don’t want to spend hours in the kitchen. With lean protein, plenty of vegetables, and a smoky, spice-filled broth, it’s a meal that satisfies your hunger and wellness goals. Whether you feed a family or prepare weekly meals, this chili is a winner. Give it a try and enjoy a bowl of comfort that’s as nutritious as it is delicious!
This flavorful and nutritious dish combines tender chicken, fresh spinach, and a rich coconut curry sauce, all effortlessly prepared in a slow cooker. Perfect for busy days, this dish offers lean protein from the chicken, iron-rich spinach, and a creamy, dairy-free sauce—delivering a wholesome, satisfying meal with minimal effort.
Imagine walking through your door after a long day, greeted by the irresistible scent of a creamy, spice-infused curry wafting from your kitchen. This Creamy Coconut Chicken Curry with Fresh Spinach is more than just dinner—a warm hug in a bowl. With tender chicken, vibrant spinach, and a luscious coconut base, this slow cooker recipe combines bold flavors and wholesome ingredients with almost no effort. Perfect for busy weeknights or a cozy weekend meal, this dish is your ticket to comfort and nourishment. Let’s get started on this flavorful adventure!
Why This Recipe Shines
Slow cookers are a game-changer, especially when you want a healthy meal without the fuss. They transform lean chicken thighs into melt-in-your-mouth perfection while melding spices and creamy coconut milk into a rich, satisfying sauce. Fresh spinach sneaks in a dose of iron and antioxidants, adding nutrition and a burst of green goodness. This hands-off recipe lets you set it in the morning and come home to a ready-to-eat masterpiece—more time for you and less time in the kitchen.
What You’ll Need: Ingredients for Success
Here’s everything you’ll need to whip up this healthful, delicious curry:
1.5 to 2 pounds boneless, skinless chicken thighs, cut into bite-sized chunks (thighs stay succulent, but breasts work too)
1 large onion, diced (brings natural sweetness and depth)
3 cloves garlic, minced (for that aromatic kick)
1 tablespoon grated fresh ginger (warming and zesty)
2 tablespoons curry powder (adjust to your spice comfort zone)
1 teaspoon ground cumin (adds an earthy layer)
1 teaspoon ground coriander (for a hint of citrusy brightness)
1/2 teaspoon turmeric (golden color and health perks)
1/4 teaspoon cayenne pepper (optional for a subtle heat boost)
1 can (14 ounces) coconut milk (full-fat for richness, light for a leaner take)
1 cup chicken broth (optional, for a thinner sauce; go low-sodium if you can)
Fresh cilantro for garnish (optional, but oh-so-good)
Pair with cauliflower rice to keep it low-carb
1. Sauté the Aromatics
If your slow cooker has a sauté setting, heat a splash of olive oil or coconut oil on medium. No sauté function? No problem—grab a large skillet instead. Toss in the diced onion and cook until soft and translucent, about 5 minutes.
2. Build the Flavor Base
Add the minced garlic and grated ginger to the onions. Stir for about a minute until their fragrance fills the air—this is where the magic begins.
3. Sear the Chicken
Drop the chicken pieces into the pan and cook until they are lightly browned on all sides. This quick step locks in juiciness and boosts flavor.
4. Spice Things Up
Sprinkle the curry powder, cumin, coriander, turmeric, and cayenne (if using) over the chicken. Stir to coat evenly and let the spices toast for a minute—your kitchen will smell amazing.
5. Move to the Slow Cooker
Transfer everything to your slow cooker now if you’re using a skillet. If you’re already in the slow cooker, switch from sauté to slow cook mode.
6. Pour in the Liquids
Add the coconut milk and chicken broth (if you like a looser sauce). Stir well so the chicken is fully immersed in this fragrant bath.
7. Let It Simmer
Cover theslow cooker and set it to low for 6-8 hours or high for 3-4 hours. The chicken will absorb all those incredible flavors and become irresistibly tender.
8. Add the Spinach
Stir in the chopped spinach about 30 minutes before you’re ready to eat. If it’s been on low, bump it to high for this last stretch to wilt the greens just right.
9. Brighten It Up
Before serving, squeeze in the lime juice and season with salt and pepper to taste. That zesty lime cuts through the richness perfectly.
10. Dish It Out
Scoop the curry into bowls, sprinkle with fresh cilantro if you’re feeling fancy, and serve over rice or with naan. Want a lighter twist? Pair it with cauliflower rice or steamed veggies.
Pro Tips for Curry Perfection
Thicker Sauce: For a heartier texture, stir in a slurry of 1 tablespoon cornstarch and a splash of water during the last 30 minutes.
Switch the Protein: Chicken breasts are an acceptable substitute, though thighs bring more moisture to the party.
Extra Veggies: Add diced bell peppers or carrots at the start for an extra crunch and added nutrition.
Lighten It Up: Use light coconut milk and skip the broth for a lower-calorie version that still tastes divine.
Why This Curry Wins Hearts
This dish isn’t just food—it’s a feel-good experience. The slow cooker does all the work, delivering a wholesome, flavorful meal that fits any schedule. Whether you’re feeding a crowd, meal-prepping, or treating yourself, this curry checks all the boxes: healthy, hearty, and oh-so-tasty.
So, what are you waiting for? Dust off that slow cooker, gather the ingredients, and let this creamy coconut chicken curry work its magic. Your taste buds and future self will be so glad you did!
Estimated Nutritional Information (Per 1-cup Serving with Full-Fat Coconut Milk)
Calories: 320 kcal
Protein: 23g
Fat: 22g
Saturated Fat: 15g (mostly from coconut milk)
Carbohydrates: 9g
Dietary Fiber: 2g
Sugars: 3g (from onion and coconut milk)
Net Carbs: 7g (total carbs minus fiber)
Sodium: 450mg (varies based on broth and added salt)
With Light Coconut Milk (Alternative)
Calories: 250 kcal
Fat: 14g
Saturated Fat: 7g
Other values remain similar (protein, carbs, sodium)
Final Thoughts
This Creamy Coconut Chicken Curry with Fresh Spinach is the ultimate blend of comfort and wellness, effortlessly crafted in your slow cooker for a meal that feels like a reward after any day. The tender chicken thighs, bathed in a luscious coconut-spice sauce, pair beautifully with the vibrant spinach, delivering a nourishing and indulgent dish. With eight hearty servings, it’s perfect for busy weeknights, cozy weekends, or stocking your freezer with a wholesome option ready when you are. The zesty lime finish and optional cilantro garnish elevate every bite, making this curry a flavorful escape you’ll crave repeatedly—proof that healthy eating can be downright delicious!
Quick note: I recommend and promote top-rated products via affiliate links. If you make a purchase, I earn a small commission at no extra cost to you. Thank you for supporting my work while you snag something extraordinary for yourself!
This tender and flavorful barbeque beef roast is slow-cooked to perfection, making it an effortless meal for busy days. It’s a guilt-free twist on a classic comfort food, made with a sugar-free barbecue sauce and a low-carb sugar substitute. The chuck roast becomes melt-in-your-mouth tender, infused with smoky, tangy flavors, while the sugar-free sauce keeps it light and healthy. Perfect for meal prep or family dinners, this versatile dish can be served on its own, in low-carb buns, or paired with your favorite sides for a satisfying, wholesome meal.
Imagine coming home to the mouthwatering aroma of tender, juicy barbeque beef roast, slow-cooked to perfection. Now, imagine that this indulgent dish is not only delicious but also health-conscious, low in carbs, and completely sugar-free. With this Slow Cooker Sugar-Free Barbecue Beef Roast, you can enjoy all the smoky, tangy flavors of traditional barbeque without the guilt. Perfect for busy weeknights or a weekend treat, this recipe is a game-changer for anyone looking to savor comfort food while staying on track with their wellness goals. Let’s dive into this flavorful, fuss-free recipe that’s as easy as it is wholesome!
Why This Recipe Is a Winner
Slow cookers are a lifesaver for anyone juggling a busy schedule, and this recipe takes full advantage of that convenience. You’ll achieve melt-in-your-mouth results with minimal effort using a chuck roast—a cut known for its rich flavor and slow-cooked tenderness. What truly sets this dish apart is its health-conscious twist: a sugar-free barbecue sauce low in carbs and bursting with smoky, tangy goodness. Paired with an innovative, low-carb sugar substitute, you can enjoy all the sweetness of traditional barbeque without the added sugar. It’s a win-win for your taste buds and your wellness journey.
What You’ll Need: Ingredients for a Healthier Barbecue
Here’s everything you’ll need to create this wholesome, flavor-packed roast:
3-4 pound chuck roast (ideal for slow cooking; substitute with brisket or rump roast if preferred)
1 cup sugar-free barbeque sauce (store-bought or homemade—see below for a quick recipe)
1/4 cup low-carb sugar substitute (such as erythritol or stevia; adjust to taste)
1 large onion, chopped (adds natural sweetness and depth)
2 cloves garlic, minced (for a savory kick)
1 teaspoon smoked paprika (brings that essential smoky barbeque flavor)
1/2 teaspoon black pepper (for a mild heat)
1/4 teaspoon salt (to enhance all the flavors)
1/4 teaspoon cayenne pepper (optional, for a subtle spicy kick)
Homemade Sugar-Free Barbeque Sauce (Optional)
If you’d like to make your sauce, here’s a quick recipe:
1/4 cup low-carb sugar substitute (erythritol or stevia)
Salt and pepper to taste
Mix all ingredients in a bowl and adjust the seasoning to taste.
1. Prep the Roast
Place the chuck roast in your slow cooker. Trim any excess fat if needed, but remember—a little fat adds flavor and moisture.
2. Mix the Sauce
In a medium bowl, combine the sugar-free barbecue sauce, 1/4 cup of a low-carb sugar substitute (such as erythritol or stevia), chopped onion, minced garlic, smoked paprika, black pepper, salt, and cayenne pepper (if desired). Stir until well blended. Taste and adjust the sweetness or seasoning to your desired taste.
3. Pour and Cook
Pour the sauce mixture evenly over the roast, ensuring it’s fully coated. Cover the slow cooker and set it to low for 8-10 hours or high for 4-5 hours. The roast is ready when it’s fork-tender and quickly pulls apart.
4. Shred and Sauce
Once cooked, remove the roast from the slow cooker and shred it using two forks. Return the shredded beef to the slow cooker and stir to coat it in the rich, flavorful sauce.
5. Serve and Enjoy
Spoon the barbeque beef onto plates or low-carb buns, and serve with your favorite healthy sides. Pair it with roasted vegetables, a crisp green salad, or cauliflower mash for a complete meal.
Pro Tips for Barbecue Bliss
Customize the Sweetness: Start with less sugar substitute (e.g., two tablespoons) and add more to taste—everyone’s preference is different!
Thicker Sauce: For a more decadent, stickier sauce, mix 1 tablespoon of a low-carb thickener, such as xanthan gum, with a small amount of water and stir it in during the last 30 minutes of cooking.
Add Veggies: Toss in sliced bell peppers or mushrooms at the start for extra nutrition and texture.
Make It Spicy: Love heat? Add more cayenne or a dash of hot sauce to the sauce mixture.
Why This Recipe Is a Must-Try
This Slow Cooker Sugar-Free Barbecue Beef Roast isn’t just a meal—it’s a celebration of flavor and health. The slow cooker does all the heavy lifting, turning a humble chuck roast into a tender, juicy masterpiece while you go about your day. With its sugar-free sauce and low-carb profile, thanks to the 1/4 cup of low-carb sugar substitute, it’s perfect for anyone looking to enjoy classic comfort food without compromising on wellness. Whether meal-prepping, feeding a family, or simply treating yourself, this recipe delivers taste, ease, and nutrition.
So, fire up that slow cooker, gather your ingredients, and let this barbecue beef roast work its magic. Your future self will thank you for the delicious, guilt-free indulgence!
Estimated Nutritional Information (Per 4 oz Serving)
Calories: 340 kcal
Protein: 30g
Fat: 22g
Saturated Fat: 9g
Carbohydrates: 5g
Dietary Fiber: 1g
Sugars: 2g (from onion and tomato sauce)
Net Carbs: 4g (total carbs minus fiber)
Sodium: 480mg (varies based on salt and Worcestershire sauce)
Final Thoughts
This healthier barbeque chuck roast is a game-changer for anyone craving that classic smoky, tender goodness without the sugar overload. The slow-cooked chuck roast soaks up the rich, tangy flavors of the sugar-free barbeque sauce—whether you opt for store-bought or whip up the quick homemade version—delivering a melt-in-your-mouth experience that’s as satisfying as guilt-free. With the natural sweetness of onion, the bold kick of garlic and spices, and a low-carb twist, it’s a dish that proves you don’t need sugar to savor barbeque bliss. Perfect for a family gathering or meal prep, this recipe offers hearty servings of comfort food you can enjoy!
Quick note: I recommend and promote top-rated products via affiliate links. If you make a purchase, I earn a small commission at no extra cost to you. Thank you for supporting my work while you snag something extraordinary for yourself!
This hearty and flavorful Slow Cooker Seafood Jambalaya combines smoky andouille sausage, tender chicken, and succulent shrimp in a rich, spice-infused tomato broth. With minimal prep, the slow cooker transforms these ingredients over hours of gentle cooking, melding bold Cajun flavors into every bite. Perfect for busy weeknights or gatherings, this versatile dish can be served over rice for a classic experience or enjoyed on its own for a low-carb option. It’s a fuss-free, crowd-pleasing meal that delivers the vibrant taste of Louisiana right to your table.
Imagine coming home to the irresistible aroma of a hearty, spice-infused jambalaya simmering away, ready to transport your taste buds straight to the bayou. This Slow Cooker Seafood Jambalaya is the ultimate comfort food—packed with spicy andouille sausage, tender chicken, and succulent seafood, all melded together in a rich, tomato-based sauce. The best part? Your slow cooker does all the work, infusing every bite with bold Cajun flavors while you go about your day. Whether feeding a hungry family or hosting a festive gathering, this one-pot wonder will become a kitchen favorite. Let’s dive into this easy, delicious recipe!
Why You’ll Love This Recipe
Jambalaya is a classic Cajun dish that features bold flavors and hearty ingredients. This slow cooker version preserves the essence of the dish while making it incredibly convenient. The sausage and chicken simmer low and slow, soaking up the spices, while the seafood—added at the end—stays perfectly tender. It’s a fuss-free meal ideal for busy weeknights, meal prep, or entertaining a crowd. Plus, when served with cauliflower rice, it becomes a low-carb, high-protein meal.
Ingredients: What You’ll Need
Here’s everything you’ll need to whip up this flavorful jambalaya:
One pound of andouille sausage, sliced – Brings that smoky, spicy Cajun kick.
1 pound boneless, skinless chicken thighs or breasts, cut into bite-sized pieces – Thighs stay juicier, but breasts work too.
1 pound shrimp, peeled and deveined – The star of the seafood show.
Optional: 1/2 pound scallops or mussels – For extra seafood goodness.
One large onion, chopped – Adds depth and sweetness.
2 bell peppers, chopped – Use red, green, or a mix for color.
3 celery stalks, chopped – A must-have in Cajun cooking.
4 cloves garlic, minced – For that savory punch.
1 can (14.5 oz) diced tomatoes – Forms the rich, tangy base.
2 cups chicken broth – Keeps everything moist and flavorful.
2 tablespoons Cajun seasoning – Adjust to your spice preference.
Cooked cauliflower rice for serving – Optional, but a classic pairing.
Instructions: How to Make It
Follow these simple steps to create your slow cooker masterpiece:
Brown the Meats Heat a large skillet over medium-high heat. Add the sliced andouille sausage and chicken pieces, cooking until lightly browned. This step locks in flavor and adds a delicious sear. Transfer the browned meats to your slow cooker.
Load Up the Slow Cooker Add the chopped onion, bell peppers, celery, minced garlic, diced tomatoes, chicken broth, and Cajun seasoning to the slow cooker. Stir everything together to combine the flavors.
Let It Simmer Cover and cook on low for 6-8 hours. The long, slow cooking time melts the ingredients into a rich, hearty stew.
Add the Seafood About 30 minutes before serving, gently stir in the shrimp (and scallops or mussels, if using). This ensures the seafood cooks just until it is tender and juicy.
Serve It Up Spoon the jambalaya over a bed of cooked rice. Garnish with chopped parsley or green onions for a fresh, vibrant finish.
Tips for Jambalaya Success
Seafood Smarts: Add the seafood in the last 30 minutes to avoid overcooking. If using frozen seafood, thaw it entirely first.
Spice It Up: Love Heat? Add more Cajun seasoning or a dash of cayenne. Do you prefer it mild? Dial back the seasoning to taste.
Thicker Texture: For a denser jambalaya, stir in a slurry of 1 tablespoon cornstarch mixed with two tablespoons of water during the last 30 minutes.
Make It Ahead: Leftovers keep well in the fridge for up to 3 days or in the freezer for up to 3 months. Reheat gently to preserve the seafood’s texture.
Why This Recipe Wins
This Slow Cooker Seafood Jambalaya is a game-changer: it’s packed with bold flavors, easy to make, and versatile enough for any occasion. The slow cooker transforms simple ingredients into a hearty, satisfying, and delicious dish. Whether you serve it over cauliflower rice or enjoy it solo, it’s a taste of Louisiana that’ll have everyone coming back for seconds. So grab your slow cooker and let this Cajun comfort dish bring some bayou magic to your table!
Estimated Nutritional Information (Per 1.5-cup Serving)
Calories: 340 kcal
Protein: 30g
Fat: 18g
Saturated Fat: 6g
Carbohydrates: 10g
Dietary Fiber: 2g
Sugars: 5g (from tomatoes, onion, and peppers)
Net Carbs: 8g (total carbs minus fiber)
Sodium: 1100mg (varies based on sausage, broth, and seasoning)
Final Thoughts
This Slow Cooker Seafood Jambalaya is a soul-warming triumph that brings the vibrant spirit of Cajun cuisine to your kitchen with minimal effort. The smoky andouille sausage, juicy chicken, and tender seafood meld into a rich, spicy tomato broth bursting with bayou flavor, all thanks to the magic of slow cooking. 8 hearty servings are perfect for feeding a crowd, meal prepping, or simply savoring a taste of Louisiana any night of the week. Serve it over cauliflower rice for a low-carb twist, and let this one-pot wonder become your go-to for cozy, satisfying meals that deliver big on taste and comfort!
Quick note: I recommend and promote top-rated products via affiliate links. If you make a purchase, I earn a small commission at no extra cost to you. Thank you for supporting my work while you snag something extraordinary for yourself!